


Are you about to start buying a panoramic paper but you have fears about pose? Don't panic! In this article, we will explain to what extent the installation of a panoramic wallpaper is today, easy and quick. You will see that by following our few advice and installation steps, your interior will be sublimated in just a few tens of minutes or a few hours. So ready to cross the course?
Is it easy and quick to put a panoramic wallpaper?
Is putting a panoramic wallpaper easier than placing a repetitive pattern wallpaper?
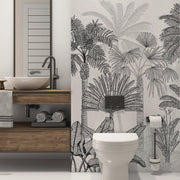
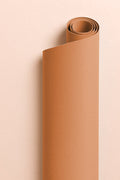
First, let's talk about wallpaper together. There are two types of pattern wallpaper on the market: repetitive patterned wallpaper, and single pattern wallpaper, or better known as panoramic wallpaper.
Putting a panoramic wallpaper may seem intimidating for novices in the installation of wallpaper, but in reality, placing panoramic wallpaper is often easier than placing a repetitive pattern wallpaper, for several reasons:
- When you put repetitive pattern wallpaper, you must make sure that each pattern aligns perfectly with the patterns of the previous LE. On the other hand, with the panoramic wallpaper, you just have one or two alignment landmarks so that the Lé is aligning perfectly. Also, making the choice to buy a custom panoramic wallpaper allows equal height les, for a much more simplified installation, without waste! 😉
- Let's talk about the fittings: the fittings are the part where the two wallpaper injuries meet. For the wallpaper with a repetitive pattern, you have to be vigilant, and well check that the les do not overlap or create holes. On the contrary, the les of a panoramic wallpaper only require that a edge -to -edge fitting, because its continuous pattern is more visible during the installation of the les.
- Panoramic wallpaper also allows you to go faster during installation, because you don't need to cut the les. Its format of numbered les allows an effective perception of the pattern. Repetitive pattern wallpaper is presented in roll format. You will then have to cut each LE, being careful that the Lé following the previous one is well connected.
Why choose to put an unstained panoramic wallpaper?
Intised panoramic wallpaper has become very popular in recent years. This is the wall covering to have absolutely to be in the tendency of interior decoration. It has many advantages in terms of installation, unlike its ancestor the traditional wallpaper.
First of all, intricated wallpaper is easier to install: unlike traditional wallpaper, it only needs a simple wall gluing. No need to bother with a gliding table and a double gluing (on paper and on the wall).
Intised wallpaper is also more resistant than traditional wallpaper. Because of its manufacture (fiber compaction), it is easier to install because you will not be afraid to tear it. You can then easily put and place the les on if you need to reposition your pattern when installing.
Should we choose thick intrased wallpaper?
Choosing thick intricated wallpaper can offer several advantages in terms of interior decoration, and especially when the latter is installed.
Thick wallpaper is more resistant and more durable, because it is less likely to tear or damage during installation. Thick wallpaper can also hide the small imperfections of your wall, giving them a smoother and uniform appearance. Obviously, and we will see it during the installation steps, preparing the wall that is about to receive your wallpaper is essential for a successful installation.
The stages of installation of an intrased panoramic wallpaper in MuralConcept
1. Prepare your wall
Good preparation is essential to ensure a good pose (it's a bit like a sportsman who trains before going to a competition). 😉Make sure your wall is clean, smooth and dry. To do this, do not hesitate to sand it, then clean it with a microfiber cloth.
If your wall is raw, we advise you to apply before your installation a primary of hanging, so that the glue can have the paper adhere (otherwise, your wall will soak the glue and your wallpaper will take off).
If your wall has been painted recently, wait until it is dry before starting the installation of your wallpaper.
2. Prepare the les of panoramic wallpaper
We invite you to unpack your panoramic wallpaper on a flat surface, in order to predispose the les in the right direction. At MuralConcept, all our les are numbered, in order to facilitate the reconstruction of your wall fresco.
3. The installation of the first le
The installation of the first le is often the longest and most stressful. But don't worry, everything will be fine!
Before putting your first Lé, we invite you to take the level of your wall, and to trace a slight line in paper pencil. This trait will allow you to lay your first right. Then apply the glue to your wall, in sufficient quantity, on the whole part which will concern the first le. Then apply yourself to put your first by following your paper pencil line. We advise you to make a slight overflow on the height and on the side of your wall so as not to have the day on the slots of the wall. The installation of your le is accompanied by a marouflette, which will allow you to smooth the surface well.
4. Les after
Once your first Lé is posed, voila! You can now set the following les, in connection on board. Same principle as in the previous step, without taking level. Adjust the fittings of your fresco, and phew! You've soon finished.
Finish: Cutting and cleaning
Once the installation of your les is finished, we go to the finishes! Bring a ruler, a cutter, and cut out your walls. Then, with a moistened microfiber cloth, clean at the fittings. Do not hesitate to pass several times, by renewing the cleanliness of your microfiber cloth. Poor cleaning of the glue surplus can stain your wallpaper, so be vigilant. 😊
We provide you with an explanatory and illustrated installation guide on our website, which will allow you to make your pose as a pro!
Is it easy and quick to put a panoramic wallpaper?
Today, you no longer have to call on a professional to put a panoramic wallpaper. As you can see above, the installation of a panoramic intimate wallpaper is easy and quick. Just follow these few simple steps, carefully, to transform your interior into no time. Your new wall decoration will be spectacular, and will make you envious.
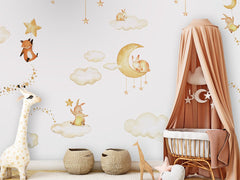
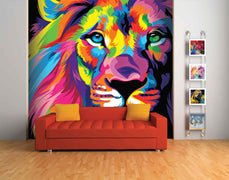
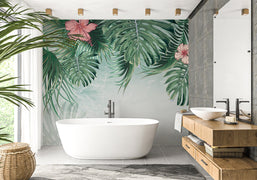
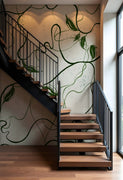
The panoramic wallpaper is very trendy, we find it everywhere, and the error would be to restrict yourself to have a personalized divine beauty and in its image, because of a simple pose, you do not believe?
So dare to ask, and send us the photo of your new panoramic wallpaper! 😊
Amly there are still skeptics among us?
Despite these clear and simple explanations, some of you can still be septic. And we don't blame you! It’s completely normal to ask questions and be afraid, especially when you’re not very handy.
Note that a new wallpaper finish is out, just for you: the pre -colored wallpaper. But Quésaco will you say to me?
Pre -central wallpaper is a type of wallpaper that is already coated with glue, in solid format, on the unacceptable side of the wallpaper. Unlike traditional wallpaper and intrased wallpaper, pre -collided wallpaper does not require glue, because it is already provided! Thanks to its composition, no need to glue your wall. You just have to spray water on the glue in solid format, then put your wallpaper on the wall. A slight marour will be necessary, but really very light, because there is no risk of glue surplus, or not enough. Pre -colluted wallpaper is even easier and quickly than the intrased wallpaper.
So how long does it take to put a panoramic wallpaper?
The time required to place a panoramic wallpaper depends on several factors, such as the size of the surface to be covered, and the type of wallpaper you have bought. In general, the installation of panoramic wallpaper can take a few tens of minutes a few hours. So follow our tips to choose the right wallpaper! And then, once the installation is made, you can immediately enjoy your new wall decor. And yes, no need to ventilate for hours or days. Sit comfortably, and contemplate. 😊
What could be better than a video, to realize to facilitate it?
Design By Mural Concept
